Home Theater Wiring Guide
Getting the picture and sound right in a home theater is satisfying. Getting the wiring right is what makes it last. Cables, conduit, and connection paths are the foundation of any serious home theater installation, and unlike speakers or screens, they are not easy to replace once the walls close.
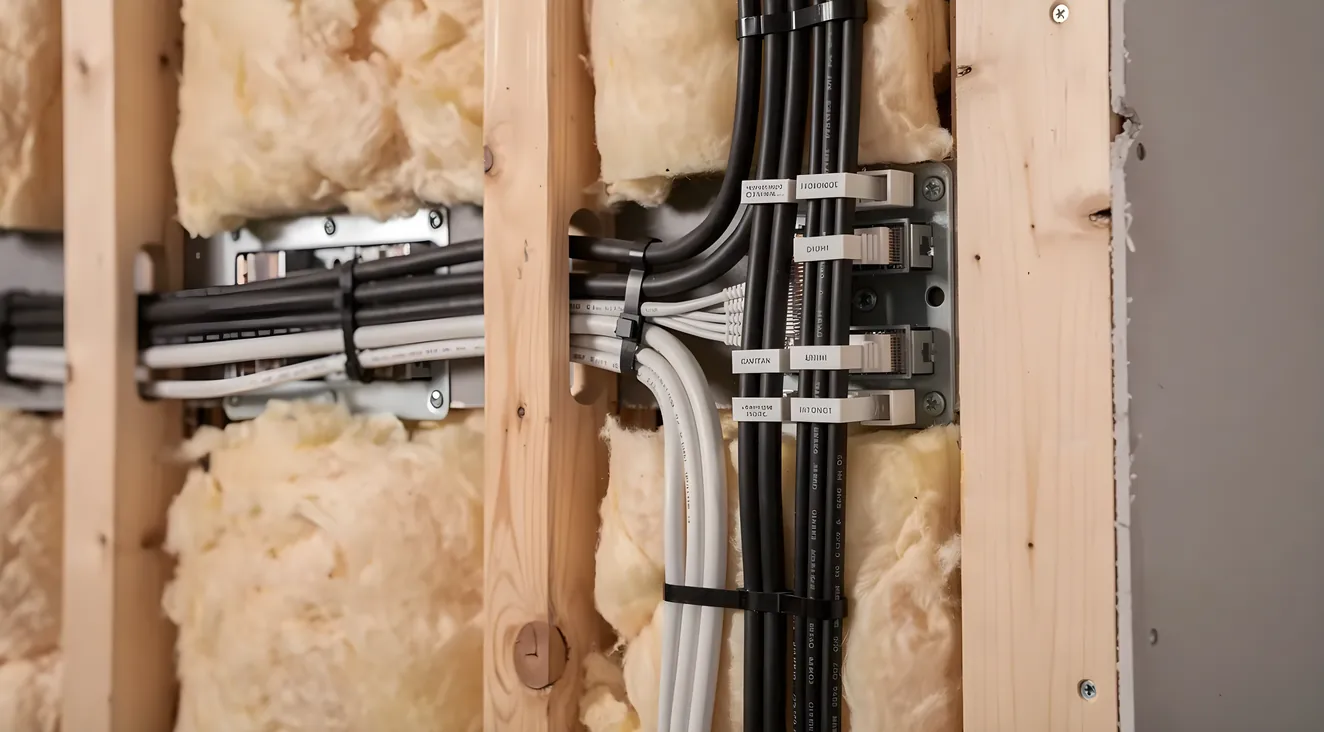
This guide covers what you need to know about home theater cable types, pre-wiring strategy, retrofit challenges common to Bay Area homes, and how to avoid the mistakes that cost money later.
Why Wiring Matters
Most home theater components sit on shelves or mount to walls. You can swap a projector, upgrade an AV receiver, or change your speaker configuration years down the line. What you cannot easily change are the cables running inside your walls.
Once drywall goes up, adding a new cable run means cutting into finished surfaces, fishing wire through insulated cavities, patching, and repainting. In a Bay Area home with plaster walls or a pier-and-post foundation, that work can cost thousands of dollars. Pre-wiring before construction or renovation is one of the few genuinely permanent decisions in a home theater build. Getting it right the first time, or at least running enough conduit to add cables later, is the single best return on investment in the entire project.
Cable Types You Need
Understanding what each cable does helps you plan how many runs to pull and where.
HDMI 2.1 is the current standard for video and audio from sources to displays. For 4K content, HDMI 2.0 works. For 8K, high frame rate gaming, or future-proofing, HDMI 2.1 is the right choice. Standard HDMI cables handle runs up to about 25 feet reliably. Beyond that, quality drops.
Speaker wire connects your AV receiver to your speakers. 14-gauge wire is sufficient for runs under 50 feet. For longer runs, 16-gauge or even 12-gauge reduces resistance and maintains audio quality. You will need runs for every speaker position: front left, front right, center, surround left, surround right, and any height or Atmos channels you plan to include.
Cat6 or Cat6a handles networking, streaming devices, control systems, and smart home integration. A dedicated home theater room benefits from at least two Cat6 drops. Control systems like Control4, Crestron, or Lutson also use Cat6 for device communication.
Coaxial cable (RG6) is worth including for subwoofer connections and any legacy satellite or cable TV inputs. It is inexpensive to run while walls are open.
Fiber optic HDMI solves the long-run problem. For any HDMI path longer than 50 feet, active fiber optic cables or fiber HDMI extenders maintain signal quality where copper degrades. If your equipment rack is in a closet or utility room far from your screen, plan for fiber.
Conduit is not a cable but deserves equal emphasis. Empty conduit running behind walls gives you the ability to add cables years from now without touching drywall. A 1-inch EMT or PVC conduit from the equipment location to the wall plate, with pull strings inside, is cheap insurance.
Pre-Wiring During Construction
The window between framing and drywall is when wiring happens efficiently. Once framing is complete and rough electrical is done, low-voltage installers can run cables freely through open stud bays.
The sequence matters. Your electrician runs power circuits first, including any dedicated 20-amp circuits for AV equipment and in-wall amplifiers. After electrical rough-in and inspection, low-voltage cables go in. HDMI, speaker wire, and Cat6 should not run parallel to or cross over electrical wire at close range if it can be avoided.
What to run while walls are open:
- One or two HDMI runs from the screen location back to the equipment area, plus a conduit for future runs
- Speaker wire to each speaker location, with extra length coiled in the wall for flexibility
- Cat6 to each component location and the TV wall
- Coaxial to the screen wall and subwoofer location
- Power to any in-wall amplifier locations
Before drywall goes up, pull a nylon pull string through every conduit. Label both ends of every cable with a permanent marker or cable label at both termination points. Then take photographs. Floor-level photos showing cable runs are invaluable when you need to add something later and cannot remember where the conduit runs.
Retrofit Wiring in Existing Homes
Bay Area homes present specific challenges for retrofit wiring. Victorian, Craftsman, and mid-century houses often have plaster walls over wood lath, which is denser and more brittle than drywall. Cutting into plaster for a wall plate or cable pass-through takes more care and leaves a harder-to-patch hole.
Attic access varies. In many Peninsula and East Bay homes, a finished attic or low-pitch roof leaves no room to fish cables from above. Pier-and-post foundations common in older Berkeley, Oakland, and San Francisco homes often allow access from below, which helps for floor-level cable routing but not for getting cables up to TV height or ceiling speaker locations.
Options for retrofit installs in Bay Area homes:
Attic runs work when there is accessible attic space with enough clearance to move around. Cables drop down through interior walls. This is the cleanest approach when available.
Crawlspace runs work for first-floor installations in pier-and-post homes. Cables run horizontally under the floor and up through the wall cavity.
Surface raceway is the practical solution when fishing through walls is not feasible. Paintable raceways mount to the surface of walls and trim to size. They are visible but far less disruptive than opening walls.
Wireless alternatives have improved enough to be worth considering for some signal paths. Wireless HDMI transmitters work for short-range applications. Networked audio systems eliminate speaker wire runs entirely in favor of network-connected speakers. These are compromises, but they are real compromises rather than failures.
Common Wiring Mistakes
Running speaker wire parallel to electrical wire. Speaker wire picks up interference from AC lines when they run in the same channel or cross at shallow angles. Keep them separated or cross at 90 degrees.
Using passive HDMI cables for long runs. A 75-foot copper HDMI cable will degrade signal. Use active HDMI cables with built-in signal boosters for runs over 25-30 feet, or switch to fiber for anything longer than 50 feet.
Not pulling enough cables while walls are open. The temptation is to pull exactly what you need today. Pull more. An extra speaker wire run, an extra Cat6, and at least one extra HDMI costs almost nothing during construction and saves significant money later.
Skipping conduit. Even if you pull every cable you think you need, conduit with pull strings is the safety net for every future technology change. HDMI 3.0 will exist. New control protocols will appear. Conduit preserves your options.
Not labeling. Unlabeled cables are a support problem. Every cable end should be labeled before drywall. Take photos before the walls close.
When to Hire an Electrician vs AV Installer
These are two distinct trades, and the work does not overlap.
Licensed electrician: Any work involving your main electrical panel, new circuits, or in-wall power outlets requires a licensed electrician. That includes dedicated 20-amp circuits for AV equipment, in-wall outlet installation at TV height, and any work inside the panel itself. This is permit-required work in California.
AV installer: Low-voltage wiring (HDMI, speaker wire, Cat6, coaxial) is AV installer territory. Low-voltage work in California does not require an electrical license, but it does require a C-7 low-voltage systems contractor license for anyone doing it commercially. A qualified AV installer handles signal cable planning, termination, rack wiring, equipment installation, and system calibration.
For a complete home theater installation, you typically need both. The electrician handles power; the AV installer handles everything else. If your project is a new build or major renovation, coordinating both trades early, before framing is complete, avoids conflicts and rework.
Bay Area AV installers who specialize in home theater can walk a space before walls close and help plan exactly what to pull. That early conversation, before construction locks anything in, is where the most valuable decisions get made.
Related resources: - Home Theater Setup Guide - AV Installation Checklist - Home Theater Installation Services - Bay Area Home Theater Directory